Working with others
Earlier in this session we saw how to push work from a local repo to one stored on GitHub. This is great for sharing or publishing work, but this session is supposed to be about collaborating with others, which will often mean making changes to an existing project started by someone else. So now we need to look at the workflow for getting work from other people, editing it, and then making those changes available to them.
We’ve actually already been over most of the individual parts of this process. Again, making changes available is covered by pushing, which we’ve just learned. We also talked about cloning and briefly about pulling in previous sessions, both of which are ways to copy from a repo in a remote location onto our local machine. So to collaborate with someone on an existing repo, we need to clone that repo, make whatever changes we want to using git add and git commit, then push those changes somewhere.
So based on that, let’s assume you want to make changes to this notebook repo. You’ve already cloned it in an earlier lesson, so that’s step one done. As a reminder though, here’s the command we used:
git clone https://github.com/OpenAstronomy/rcsc18_lessons.git
In our case, since you already have a folder with the same name as the repo it’s trying to clone, this command will fail. But suppose changes have been made to that repo since you cloned it? If we make changes in the same places, then git won’t know how to apply the two sets of changes (this is called a conflict - more on this later). So we work on the most up-to-date version of the repo, which means getting the changes made to the remote and applying them to our local repo. In this case you should run git pull. Do this now with the command
git pull origin master
Already up to date.
Now we want to make some changes to the repo. You may have noticed a new notebook in the repo called collaborators.ipynb. We’ll be using this notebook to demonstrate the collaboration workflow. Open it now and add your name and GitHub username to the empty cell underneath the heading. Then save the notebook and commit your change with the usual git add and git commit commands.
Once you’ve made your changes, you want to share them. We’ve already seen git push in action, so we want to do that again, right? Try it now.
git push origin master
You should find that this hasn’t worked. This is because the version of the repo on GitHub belongs to me, and you don’t have permissions to write to it. This is an important aspect of working collaboratively because it means I can trust that nobody can change my copy of my code unless I give them permission. I could give all of you permissions to access my repo and have you all push there, but I’m not going to. One reason is because the changes you have made would conflict with everyone else’s, so the push still wouldn’t work anyway (again, more on dealing with this in a later session). Another is that it is actually often more useful to have your own version of a repo on GitHub, because it means that you can back up and share incremental changes to the repo before you and your collaborator are ready to combine your work.
So how do you get your own remote copy of someone else’s repo?
Forks and forking
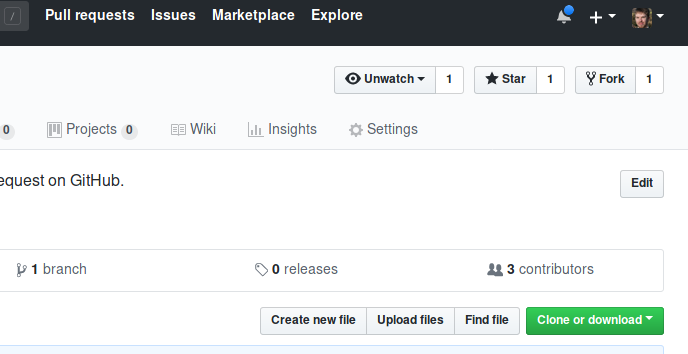
Just like creating a remote repo from scratch, making a remote fork can only be done on GitHub, not through the command line. To make a fork of this notebook repo, go to my copy of it: github.com/OpenAstronomy/rcsc18_lessons and click the Fork button in the top-right corner, as shown below.
And that’s it! This may take a moment but then it should take you to your own repo which you’ll see is a copy of mine. You should also notice that at the top of the page it tells you where the repo came from:
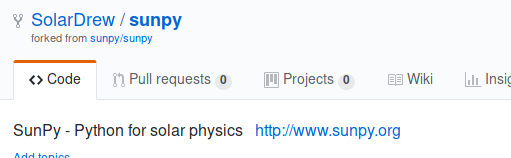
This is why we fork a repo rather than creating a new, empty one and pushing changes to it later - now GitHub knows that your new repo is associated with mine, and this will make things easier later when we want to compare differences between the two.
Using your fork
So now you have a fork of the repo so now you can push, right? Try it again.
git push origin master
It still doesn’t work! To see why, we need to look at the origin remote and see where we’re trying to push to:
git remote -v
origin	https://github.com/OpenAstronomy/rcsc18_lessons.git (fetch)
origin	https://github.com/OpenAstronomy/rcsc18_lessons.git (push)
This tells us that the origin remote is still pointing at the version of the repo that you forked. Fortunately, you can change where a remote points to, with the git remote command, like this:
git remote set-url <name-of-remote> <new-remote-url>
so we can set the URL of the origin remote to be your fork:
git remote set-url origin https://github.com/<your_username>/rcsc18_lessons.git
Now, at last, you can push to your new fork:
git push origin master
Now go back to your browser and look at your fork on GitHub. You should see now that the changes you’ve committed to the repo (you may need to refresh the page first). You can also go back to my copy and you’ll see that it hasn’t been affected by your changes.
Introducing upstream
But wait, now if you pull from origin, you’re getting your own fork. A lot of the time this is fine (when you move to working on a different computer, for example), but ealier we said we want to get changes our contributors have made before making our own. How do you do that now that you can’t pull from origin?
For this, you need to make use of the fact that git allows you to specify multiple remotes for a repo, using the git remote add command which we’ve already seen:
git remote add <name-of-remote> <url-of-remote>
In this case the URL is the one which used to be origin (https://github.com/OpenAstronomy/rcsc18notebooks.git). But what about the name? Well you can call it anything, but there are some conventions for remote names. One we’ve already seen is ‘origin’, which is used for _your remote version of the repo. In this case where there is a single ‘main’ version of the repo which other people fork, the convention is to call the main repo ‘upstream’.
git remote add upstream https://github.com/SolarDrew/STFC-summer-school.git
Now if you look at your remotes again you’ll see that you have two now, one called origin pointing at your repo, and one called upstream which points at mine.
git remote -v
Other ways to handle remotes
In this case we cloned the repo first, then forked it on GitHub, so we had to change the origin remote. This is a common path, particularly when you want to look at a project locally before you know that you'll want to collaborate on it. But sometimes you will want to fork the repo first, and then clone your own repo. In that situation, the origin remote will already automatically point at your GitHub repo, and you will only need to add upstream to point at the main repo.
You may also want to use a remote which is somebody else's fork of a central repo, rather than that repo itself or your fork of it. In this case a useful name for that remote would be that person's name or GitHub username, so for example:
git remote add cadair https://github.com/Cadair/rcsc18_lessons.git
or
git remote add stuart https://github.com/Cadair/rcsc18_lessons.git